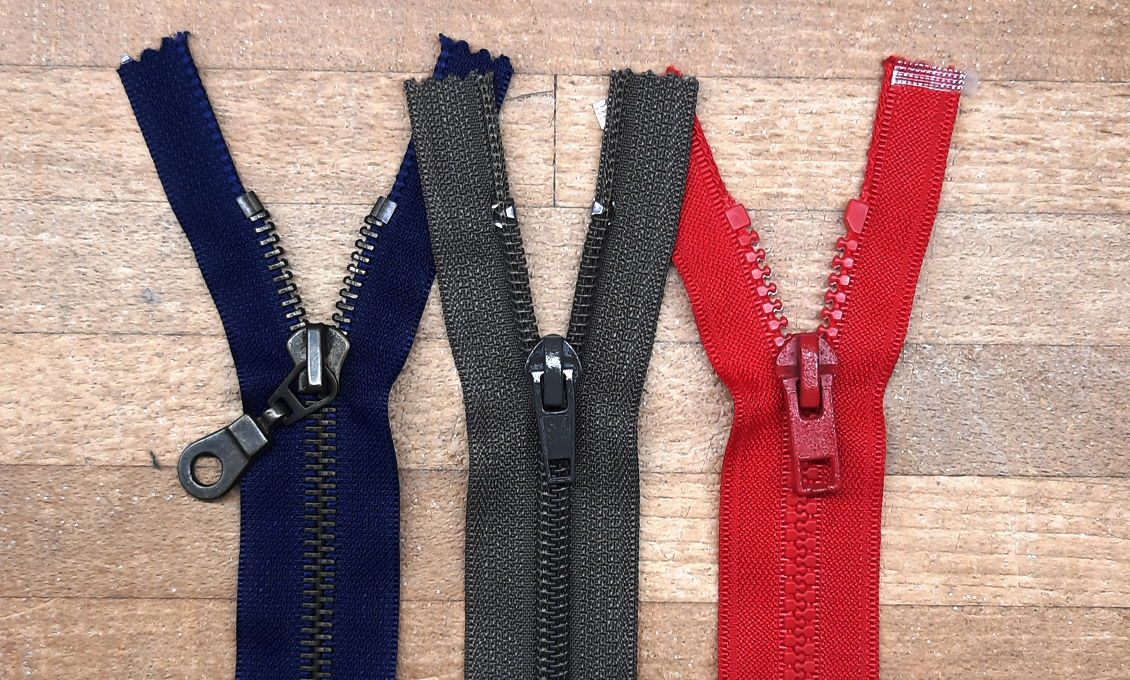
Zipper Guide

Sewing Tutorial

The variety of zippers on the market can be confusing. Essentially, there are 3 main types of zippers: metal, coil, tooth. Each of these can come as the standard, water-proof, or water-resistant version. In addition, each of these can be either open-end, closed-end, or a separating zipper. And they can have additional features on top, such as being one-or two-way, double-sliders, reverse-coil, or concealed. This only scratches the surface of the zipper market, but it is the nutshell needed for outdoor clothing. This basic guide helps you to pick the right ones for your projects.

Metal Coil Tooth zippers

Metal- Coil- Tooth Zippers

Zippers can be placed into three main categories: the metal, coil and tooth zippers. All can come in different widths and are used for different purposes depending on the project and the strength needed.
All share these five common part names:
the tape, elements (teeth/coil), slider, top stopper and bottom stopper. The bottom stopper at one- or two-way zippers are called pin and retaining box.

Reverse look of Metal Coil Tooth zippers
Reverse look of
Metal - Coil - Tooth Zippers 
Tooth zippers

The teeth look like single elements on both sides of the tape. They can be made from plastic or metal. Both sides look the same. Just the slider tells you which is the outer side.
These zippers are more durable and less flexible.

The difference between tooth and coil zippers is simple.
The elements look different. 

Coil Zippers

The coil is a spiral sewn onto the tape. The coil is made from plastic. These zippers are less durable and more flexible. They can be used also reversed as the outer and inner side look different.

Zipper sizes

Zipper sizes
  • Personally, I prefer 3-5 mm (0.12 -0.5") or 8 mm (0.31") wide coil and tooth zippers for my outdoor garments. Occasionally I need a 10-12 mm (0.4 -0.47") wide zipper for a ski- or duffle bag. So it is up to you what you use.

Different Zipper sizes

Zipper Features

Zippers can have very different features. These are the main examples which are most relevant in outdoor clothing making:
- By-the-meter
- Closed-end
- Reverse look
- Separating
  - One-way
  - Two-way
- Water repellent 

By-the-Meter Zippers

By-the-meter zippers are zippers where you decide how long the zipper needs to be. You need two parts, the zipper tape and the zipper slider. These types of zippers work best for pockets, ventilation openings, pants fly-fronts, tents, bags and backpacks... .
It is easy to insert the zipper sliders yourself. You freely choose the final length, how many and where the sliders open your projects and the looks of the zipper in your project. Sometimes the reverse side of the zipper looks nicer.
These zippers should be closed with a ribbon or stoppers at either end. 
In any case, make sure you get the right sliders when buying.

I use a 1 cm (0.4") wide ribbon to close the ends and to prevent the zipper from re-opening from the wrong end. The top-end stoppers make it easier to finish this part.

Closed-End Zippers

Closed-end zippers are closed at one end and open with one slider from the other end. Sometimes it is just better and easier to use the closed-end zippers for your projects. They are more widely available. The sold length comes in fixed length and gets longer in 2 - 5 cm (0.8 -2") intervals. The length can be easily shortened either at the top-end with stoppers or at the bottom-end with 1 cm (0.4") wide ribbon. 

Regular Coil & Reverse Coil

'Regular' looking coil zippers have the coil visible from the outside.
'Reverse' looking coil zipper have the coil visible from the inside.

Separating Zippers

Separating zippers split a garment piece into two pieces, like a jacket. This can be done with a one-way or two-way separating zipper. These zippers are also used in outdoor pants, bag or covers. For example in outdoor pants, a two-way separating zipper would split the pants on the side seam into a front and back pant piece.

One-Way Zippers

One-way separating zippers split your garment from the top down and the zipper has one slider.
Use these zippers where you want to for example split-open the garment or project piece, like in jackets, separating pants legs, bags, backpacks, as pocket zippers .... .
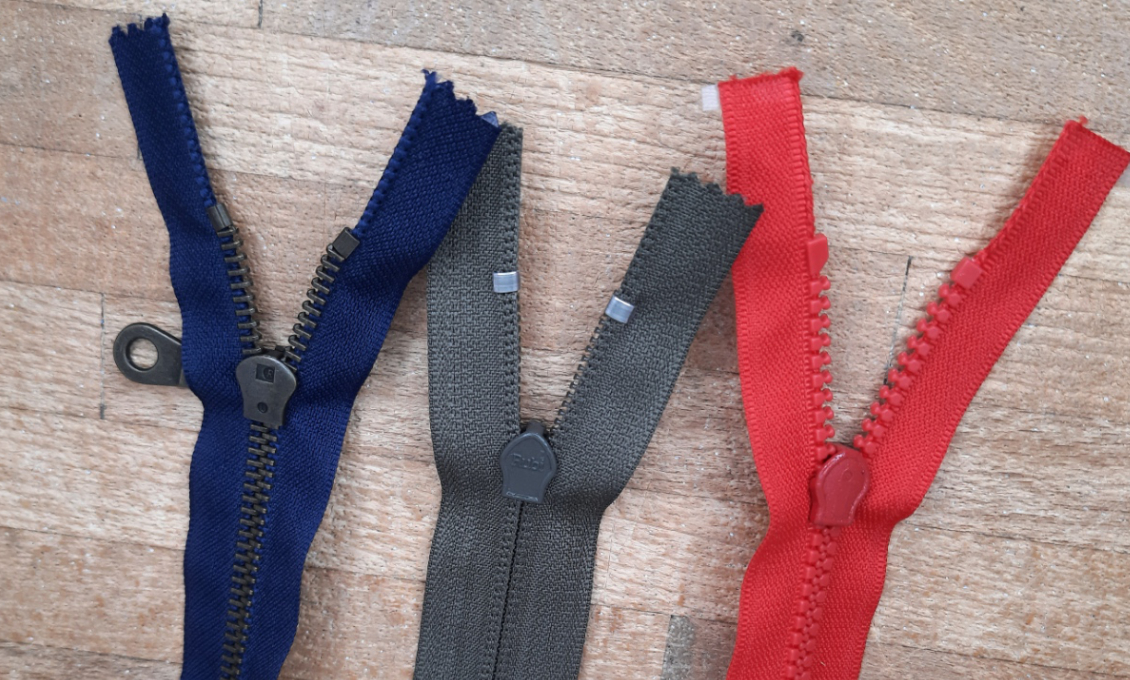
Two-Way Zippers

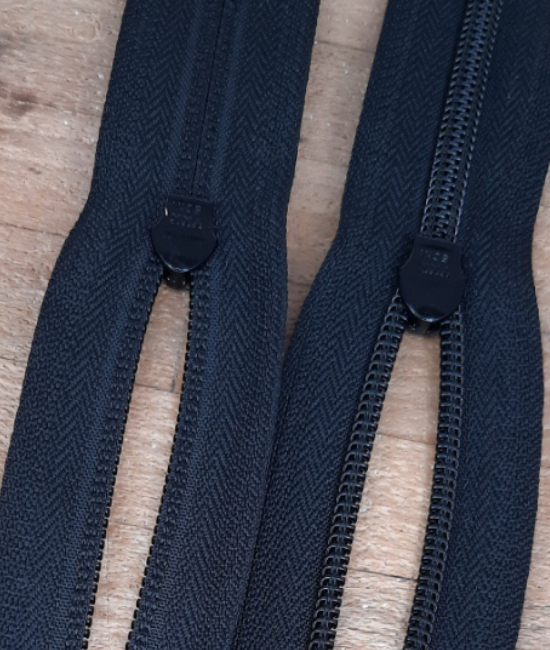
These zippers have two sliders. Either to separate two pieces from each other or to split-open the pieces from either end. Splitting can be done in two different ways:
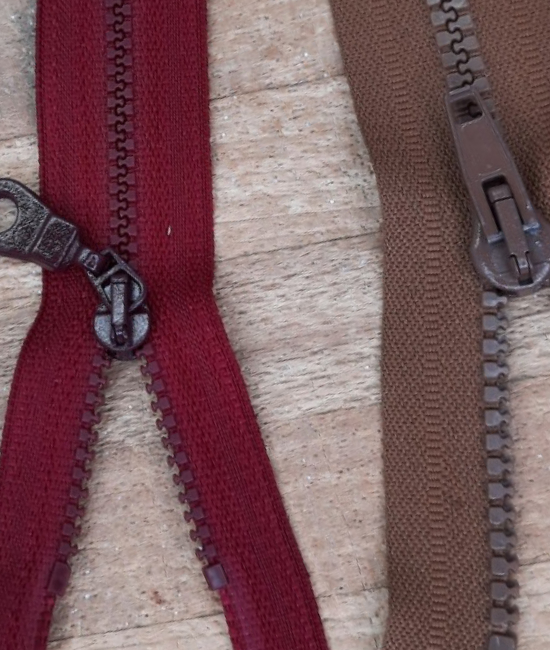
'slider bottom' to 'slider bottom' opens into an X or
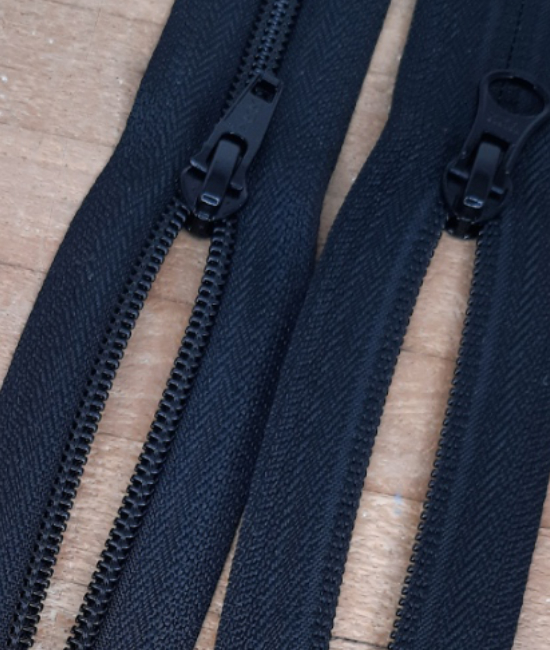
'slider head' to 'slider head' opens into an O.

In jackets, 'slider bottom to bottom' two-way zippers are not as durable as one-way zippers, as they break faster but they offer a wide range of flexibility when you wear it.

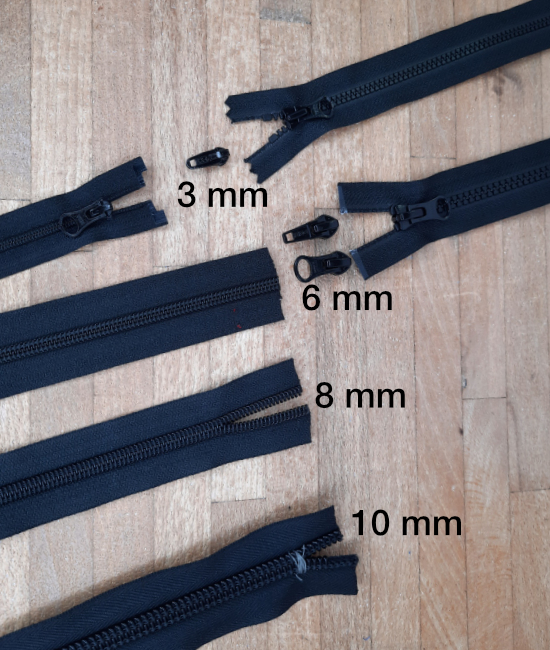
Note: All sold zippers come in fixed length and get longer in 2 - 5 cm (0.8 -2") intervals. The length can easily be ajusted, either at the top-end with stoppers, or at the bottom-end with 1 cm (0.4") wide ribbon. 


Water- repellant & Windproof Zippers

Zippers can also be water- repellent or watertight and to the same time wind- proof. This is done through a PU coating applied to the outside of the tape including the teeth or coil. These types of zippers are nice for most outdoor gear projects and garments as extra outside covering flaps can be avoided to safe weight. Really waterproof zippers are mostly used in wetsuits to provide watertightness. They are much heavier.


Water repellent zippers

Tooth Zippers

Water repellent tooth zippers look matte and the teeth can still be seen from the outside. These zippers are overall more durable than water repellent coil zippers. In case you need to change the slider make sure you get the right one. The slider(s) is easily replaceable.

Coil Zippers

Water repellent coil zippers look more shiny and the tape has a reverse look. Which means you can only see the coil from the inside. These type of watertight zippers can wear out quite easily, but if you buy a good brand, the slider(s) is easily replaceable as a first action. Make sure to get a REVERSE coil slider.

See section for 'Replace zipper slider' and 'Shortening zippers'.

How to Shorten Zippers

Sometimes it is just easier to use a longer zipper and shorten it. At what end you shorten the zipper, will depend on how you intend to use the zipper.

One-way and Two-way separating zippers: used for jackets, are shortened at the top-end.
One-way and Two-way separating zippers: used for backpacks, can be shortened at either end.
Closed-end zippers can be shortened from either end.
The two most common examples are explained below.


Closed-end zippers

Decide if you want to shorten the zipper at the top or bottom end.
Usually it is easier to cut off the extra at the bottom.

Bottom-end shortening
  1. Match the top-end last element of your zipper to the start of the opening of your garment.
  2. Sew in the zipper. 
  3. Add 1 - 1.5 cm (0.4 - 0.6") to the determined final length of the zipper as seam allowance.
  4. Place a 1 cm (0.4") wide ribbon over the end and sew carefully along both long edges of the ribbon. Sew carefully over the zipper elements, so you do not break your sewing machine needle.
Use this technique to finish the end(s) of a by-the-meter zipper.
Top-end shortening
  1. Match the bottom end of your zipper to the end of the opening.
  2. Sew in the zipper. 
  3. If the zipper starting point is covered with an extra garment piece, like in pants with a zipper front, first sew the garment piece over the zipper then cut off the extra of the zipper.
  4. If the zipper starts from a normal seam, like a side seam, use the bottom-end shortening technique.

Tools to shorten zippers or replace sliders

How to shorten separating zippers

The final length is determined after you have sewn-in most of the zipper.
It is usually easier to stop sewing 2 - 3 cm (0.8 - 1.2") below the top end.

  1. Place a pin where the zipper elements have to stop.
  2. Add 1.5 cm (0.6") to that pin and cut off the extra.
  3. Remove the elements in the 1.5 cm (0.6") section.
  4. Do not move the slider, as you might accidentally run it off.
  5. Place a new top-stopper close to the last element and secure the stopper with a pair of pliers.
  6. Fold the zipper tape 45 degrees over and then over again.
  7. Finish sewing the zipper according to the instructions.
  8. Finish one side before you do the other side. 

Replace zipper sliders

Zipper sliders wear out and can easily be replaced. So your first action should be to check if you can replace them before changing the entire zipper. If the teeth or coil and the pin and retaining box are still intact, the slider is most likely worn out.

Make sure you get the right looking slider for your zipper, clip off the left top end stopper, slide the old out and the new in. Add a new stopper at the top end. Done!


Precautions on Zipper use

Precautions on Zipper use

Take care of your zippers while and how you use them. This will add to the lifetime and saves you the time and unnecessary frustration to change them.
The well known zipper company YKK has a very nice guide on this topic. It includes:
- Ironing and laundry procedures
- Keeping the slider running smoothly
- Fabric caught in the slider
- How to gently close zippers in bags
- Proper use of open-end-zippers (one-way & two-way zippers)
- Dressing and undressing


My Zipper sewing Tips

Tip 1: Zipper length

When you decide on the length of a closed zipper for a garment or zipper opening, make sure the opened zipper reaches ~2cm (1inch) lower than the desired opening. This takes stress off the bottom end of the zipper and it is easier to reach in-and-out, or to dress and undress.
Keep this principle in mind when planning for zipper openings.

Example:
- pants, dress or skirt:  the hip area is usually the widest point
- hand pockets: hand width + some extra ~ 4.5cm (2 inch) + slider length ~2cm (1 inch)

Tip 2: Zipper flap

Tip 2a:

Topstitch through the ready zipper flap, so there is no ‘loose’ fabric right behind the slider. Or sew a grosgrain ribbon onto the flap where the slider is running up and down.

Tip 2b:

The flap / wind-flap behind the zipper should have a little bit of space, so it can move away from the slider during operation. So, when sewing on the flap behind the zipper, use the regular presser foot and not the zipper foot.


Related Tutorial