Tips & Tricks

Sewing Tutorial

Tips & Tricks help you to have an even better outcome and get you through
difficult and often frustrating sections.

Removing unwanted stitches

Removing unwanted stitches

Opening seams or removing unwanted stitches is always a pain in the neck,
and if they are made from thick thread it's even worse.
First, cut the thread about every 1.5 - 2 cm (0.6 - 1'') from one side,
where the thread is easily seen.
Then pull the thread from the other side and the stitch unravels easily.

By-the-way, to be always on the safe side, use nice pointy scissors and not a ripper.

Manual Back-Stitch

Sometimes back stitching is not a good option for different and often frustrating reasons, such as a thick, bulky seam and/or the seam is just not staying flat, the needle gets bent and breaks, the thread is looping up…
This trick shows you how to back stitch manually by always sewing 'forward' and turning the fabric instead.

Step 1

Start sewing about 3 - 4 cm (1.2 - 1.6") away from the difficult part.
Sew about 1 - 2 cm (0.4 - 0.8"). Do not back stitch.

Step 2

Leave the needle in the material, lift the presser foot, and turn the material 180 degrees. Sew over the first stitches all the way to the difficult part.

Step 3

Leave the needle in the material, lift the presser foot, and turn the material 180 degrees again.
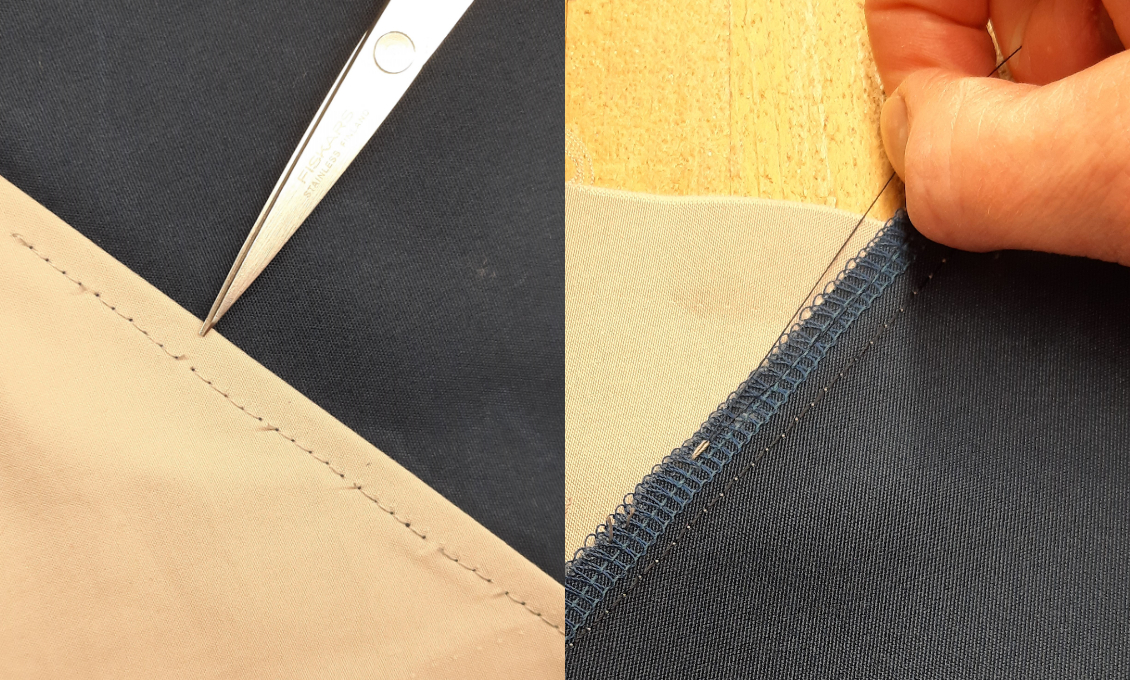
Tip:

Sometimes it helps to place a pin right into the corner. Use the pin to hold and guide the fabric in place.

 
Reinforcement Square

Sewing a Reinforcement Square

Your gear needs to be sewn on and attached secure.
Use this technique to attach webbings or reinforce parts of your gear to each other. Such as buckles, rings, loops to webbing or belts, secure or reinforce guyout-points,
or loops to tents. This technique is called the box- and x- pattern.
Start at number one (1) and stop at number nine (9).

Sewing straight seams is a challenge

Looking at the moving needle while sewing results in sewing crooked. Instead, use the different guide edges the sewing machine has to offer. For example, line up the fabric edge to the edge of the presser foot of your sewing machine and focus on the two edges. This alone will help to sew straight.


The Presser Foot

The presser foot functions as the best guide. Measure the presser foot before you start sewing. Write the options down and keep this note close to the machine, so you remember later. 
These are the most common presser foot measurements:
1. From the needle to the outer edge: 0.7 cm (0.27'') wide.
2. From the needle to the inner edge: 0.2 -0.3 cm (0.08 - 0.12'')
3. Move the needle from its center position to the left or right: 0.8 - 0.9 cm ( 0.31 - 0.35'')

When you follow a marked pencil or chalk line on the fabric, line it up with the center mark of the presser foot and keep your eyes on the line.

The Stitch Plate

Most sewing machines have guide rulers in cm and inch marked on the stitch plate. Line up the edge of the fabric to the guide ruler of your choice. Keep your eyes onto both edges and you will notice that the seams become straighter.

Simple Cross Stitch

It is always a good idea to wash the fabrics before you start a project. This eliminates shrinkage after the first wash.

Mark your outer and inner fabric side before you wash your fabrics for the first time.
Pencil and chalk marks usually disappear in the wash.
Hand sew an X in a corner of the outer fabric side. ‘X’ marks the spot!


Make a knot into one end of your thread. Insert the needle into the fabric at #1.
Come back out shortly after. Go back into the fabric at#2, come back out at #3.
The rest numbers secure the thread so the stitch does not come undone in the wash.


The images show you the view of the outer and inner farbic side.

Related Tutorial